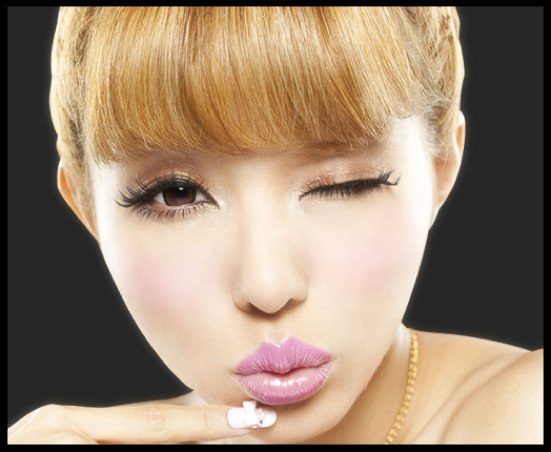
Gyaru/Dolly Eye Makeup
Helloooo Everyone! I'm back with a dolly makeup tutorial that was recently requested - more specifically about the eyeliner part. Generally the cute dolly makeup look is also known as the gyaru look, and of course Tsubasa's makeup is a prime example to observe. As you all know, I am a monolid, so my way of eyelining is slightly different from those who are double lidded. But essentially, a dolly look is just about the "puppy eyes", where you extend your line downwards instead of winging it up, false lashes and pink/nude lippie. In this tutorial I'm not trying to recreate her look exactly, these photos are just one of the many I've found to use as an example and reference. :)

Eyelining: Broken into The Small Details
Step 1.1: Because I have monolids, how thin or thick my line is doesn't matter because when i look up the line is gone lol So to make it even easier for myself, I first line my eyes with a pencil liner. Not only will this make lining my eyes with liquid liner over top effortless it also fills in the gaps between the lashes. I usually start from the middle and do short strokes going outwards.
**If you are double lidded, instead of lining your eyes with pencil first, just go straight ahead with liquid since you want a nice thin line. But the technique is the same, start in the middle and move outwards with short strokes.

Step 1.2: Next finish lining the eyes from the inner most corner to out. Why should we start in the middle first? Because as you keep doing short strokes, every stroke overlaps. So when you do the inner corner last, you have more gradual tappered and thinner line.

Step 1.3: Go over the pencil with your liquid eyeliner. By doing so, you will make your eyeliner last and of course, if you are double lid this wouldn't apply to you if you started with a liquid eyeliner. For this particular look, I gradually made the center/middle slightly thicker to make my monolids more rounded for the dolly eye look.

Step 1.4: Now for the wing: slightly line past your eyes downwards and extend out to a fine point. Make sure your wing is slightly curved for the puppy/doll eye. If you draw a straight blunt wing, it will be more strong and cat eye like instead of the cute eyes you are going for.

I purposely made my eyes look double lid for a second to show you guys how this should look like hahaha and now we are done with the eyeliner part! :) Whether you like to line your eyes first or do eyeshadow first, it doesn't really matter. But I guess lining your eyes first would give you a good guide line of where you want your eyeshadows to be.

Eyeshadow
Step 2: Apply a light shimmery gold color all over the lids for a wash of color and use it as a transition/blending color. Also highlight the brow bone with this shade.

Step 3: Taking the bronzy orange shade, apply it over the lids and blend the edges into the light gold color

Step 4: With the dark brown color, apply it to the outer corner of the eye and blend into the bronzy shade

Step 5: Bring the dark brown color to the lower lash line and go a third of the way in.

Step 6: Take a shimmery white shadow and highlight the inner corner of the eye to give attract light and brighten up the eyes.

Step 7: To make your eyes look even bigger, line the waterline with a white eyeliner pencil. I also curled my lashes, applied mascara and popped some falsies on :P If you have lower lashes put those on too, I don't have any at the moment, so I just applied more mascara to my bottom lashes.

Step 9: Set the liner with a white eyeshadow to make it last longer.

Step 10: And then you're done!.........well not quite ahaha you still have an option of lining/defining the inner corner of the eye with your black liquid eyeliner. This is kind of a personal choice, personally I don't think my eyes look that great with defining the inner corners - defining mine actually elongates them making them a little less doll like because my eye shape is more flat than round lol but I'll just show you anyways. I'm sorry I couldn't do a up close detail shot because the sun was gone and my macro setting can't take decent shots under artificial lighting =_= But all you do is to create a slight point at the tip of your eye and connect it wit the top lash line as well as the bottom, but only extend it an eighth of the way for the bottom lash line (refer to the last picture).
 |
| unlined inner corner |
 |
| defined inner corner |
And now this is the final completed look! I hope this tutorial helped. If you guys have any questions feel free to ask or if you have any requests just let me know! Hope you all had a great weekend!
Products Used
Face
- Make Up Forever HD Primer
- GOSH Cover Me Up Makeup Mousse in 01 Ivory
- ELF Studio HD Powder
- Maybelline Dream Matte Powder
- Bobbi Brown Corrector in Light Peach
- NYX Powder Blush in Taupe (for contouring)
- ELF Studio Blush in Pink Passion
- Jill Stuart Loose Powder in Twinkle Dust (for highlighting)
Eyes
- Urban Decay Primer Potion
- Kate Crystalisse Quartz Palette in BR01
- Dolly Wink Eyeliner
- Maybelline The Falsies Mascara
- Giorgio Armani Eyes to Kill Mascara
- NYX Jumbo Eye Pencil in Milk
Lips
- NYX Pencil Lip Liner in Pink Nude
- Maybelline Color Sensational Lipstick in Born With It
- ELF Conditioning Lip Balm in Peaceful Pink
Wow, Excellent post. This article is really very interesting and effective. I think its must be helpful for us. Thanks for sharing your informative.
ReplyDeleteearn money online | social bookmarking sites list | article submission sites | blog commenting sites | forum posting sites | press release sites list | outsourcing | off page seo | seo tutorial | free seo tools | directory submission site list | social exchange sites
free movie downloads | movies | movie trailers | horror movies
islam | muslim | singles | marriage | quran | religion | quran real audio
Funny | Funny Moments | funny videos | minecraft | entertainment | get money for sharing youtube videos | earn money without investment | makeup tutorials
play free online games | free online games | entertainment news today | celebrity news today | funny video clips